How To Make A Shadow Box Card - PartiCraft (Participate In Craft): Christmas Shadow Box Card - Join stephanie and learn how to create a shadow box card, inspired by design team member torico, using products from the new january 2018 release.
Dapatkan link
Facebook
X
Pinterest
Email
Aplikasi Lainnya
How To Make A Shadow Box Card - PartiCraft (Participate In Craft): Christmas Shadow Box Card - Join stephanie and learn how to create a shadow box card, inspired by design team member torico, using products from the new january 2018 release.. Cut two sheets of card stock paper to fit snug inside your box. I am sure i am just like you, i was amazed at how easy this shadow box card was to make. Using the ink blending tool and distress oxide ink, add in the color onto the white cardstock. Put the colored cardstock on the inside of the cover panel, draw a line at the left end. Cardstock — regular 20 or 24 lb.
This will be your lightest color layer. I used the layering stitched rectangles and cut the designer paper first then laid it on the front cardstock and marked where to cut glue the designer paper on the front card stock stamp on the back piece of card stock. Cut a piece of blue cardstock just a tad bit smaller than 5.00″ x 3.75″ to fit inside the box and use as the scene base. Now, bring the other tab over to the corresponding side on the outer card layer and press in place. Are you looking for an extra special card design?
My SVG HUT: August 2015 from 3.bp.blogspot.com It's important that you use 65 lb. You can align cards with flex or add transform: Adhere front part on the back part. It is helpful to use the 1 score line as a guide. Continue the process by adding each card layer next to the previous layer. Cut a piece of blue cardstock just a tad bit smaller than 5.00″ x 3.75″ to fit inside the box and use as the scene base. Its been a while since i've made this style card, so i opted for a 6 x 6 version today. Then cut another card panel from patterned cardstock (slightly smaller than the pink card panel).
Its been a while since i've made this style card, so i opted for a 6 x 6 version today.
The paper shadow box and card base. In today' video i have lots of tips and tricks: Cardstock — regular 20 or 24 lb. October 22, 2019 november 12, 2019. With a few score lines you can make this very simple shadow box, featuring a fun interactive element! Then cut another card panel from patterned cardstock (slightly smaller than the pink card panel). This shadow box card is a 3d interactive card which gives a feel of animated scene inside.#diyblastercards #diyblastercrafts Fold the frame sides in and use the bone folder to crisp up the crease on each fold. Cut the shadow box frame using bright green cardstock. I offer several designs on my website! I am sure i am just like you, i was amazed at how easy this shadow box card was to make. Use your scissor to cut the four corners. Apply double stick tape to the top and bottom inside tab edge of the box.
To make this shadow box paper art project, you'll need 65 lb. Cut the shadow box frame using bright green cardstock. To use my box pattern, just cut it. It is helpful to use the 1 score line as a guide. Fold all the score lines in towards the center and use the bone folder to create a good crease.
Lori Whitlock Shadow Box Card tutorial for Cricut Design ... from i.ytimg.com Adhere the frame on the first scene piece. This will be the front of the shadow box. How to make a shadow box card before beginning, i stamped random images from the stamp set, colored and cut out each. 0 4px 8px 0 rgba(0,0,0,0.2); Both front and back panels measure 5.5 x 6.25 Score along one side at 1″ & 6″ then flip the cardstock and score at 1/2″ and 6.1/2 1 piece of 7″ x 7″ coloured card stock for the back of the card. In its simplest use, you only specify the horizontal shadow and the vertical shadow: I offer several designs on my website!
To use a display frame, just flip it over, take off the back, and set your custom shadow box inside face down.
Draw the line 1/4 inch to the left from the center of the card. Julie's project today has a quick and easy, brayered ink background. Fold the frame sides in and use the bone folder to crisp up the crease on each fold. Adhere the frame on the first scene piece. Cut a piece of blue cardstock just a tad bit smaller than 5.00″ x 3.75″ to fit inside the box and use as the scene base. You can align cards with flex or add transform: Place each of your layers into the box, fix any loose ends, and cover with a snug sheet of card stock. In today' video i have lots of tips and tricks: Shows several variations!** supplies are linked to stores below** for more info: Using a block of patterned paper cut a little larger than the card openings, i arranged the pieces until i was satisfied with the layout. Score along one side at 1″ & 6″ then flip the cardstock and score at 1/2″ and 6.1/2 1 piece of 7″ x 7″ coloured card stock for the back of the card. Leave it at 12 x 12 or cut to 11 x 11 inches, scoring is the same for both sizesscore on all f. Fold all the score lines in towards the center and use the bone folder to create a good crease.
It is helpful to use the 1 score line as a guide. With a few score lines you can make this very simple shadow box, featuring a fun interactive element! 0 4px 8px 0 rgba(0,0,0,0.2); Join stephanie and learn how to create a shadow box card, inspired by design team member torico, using products from the new january 2018 release. Adhere front part on the back part.
colour me happy: More shadow box cards & a tutorial for you from 3.bp.blogspot.com Use your scissor to cut the four corners. Place oval template in the center of one of the scored quarter sheets. This will be your lightest color layer. Cardstock — regular 20 or 24 lb. Cut the 4 7/8″ x 3 5/8″ scene base using aqua cardstock. This 3d card stock shadow box is absolutely amazing and mesmerizing! Apply double stick tape to the top and bottom inside tab edge of the box. Join stephanie and learn how to create a shadow box card, inspired by design team member torico, using products from the new january 2018 release.
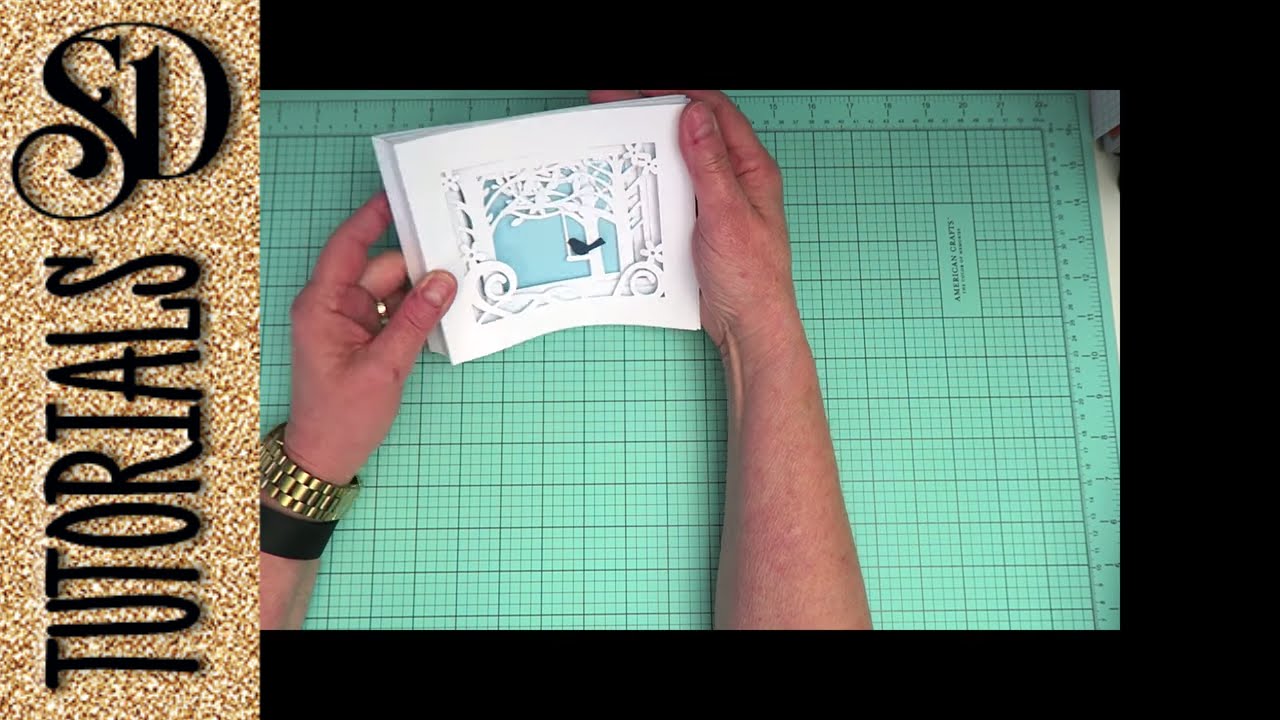
Here are the cards from my video along with the main products featured.
Here are the cards from my video along with the main products featured. Using the ink blending tool and distress oxide ink, add in the color onto the white cardstock. Make the holes at the position of the lights. This 3d card stock shadow box is absolutely amazing and mesmerizing! Both front and back panels measure 5.5 x 6.25 Adhere the frame on the first scene piece. Starting to the right of the card window, press your first layer in place. These cards are easy, you can use the supplies you already have and they are quick too! Shows cards that open to reveal a shadow box.** supplies are linked to stores below** for more info: How to make a shadow box card before beginning, i stamped random images from the stamp set, colored and cut out each. Place oval template in the center of one of the scored quarter sheets. With a few score lines you can make this very simple shadow box, featuring a fun interactive element! For the full supply list, scroll down to the thumbnails at the end of this post.
What Are The First Signs Of Pancreatic Cancer : Warning Signs and Symptoms of Pancreatic Cancer - CancerOz : These symptoms and signs may include poor appetite, weight loss, abdominal or back pain, jaundice (yellowing of the eyes or skin, dark colored urine and/or light colored bowel movements) with or without itching, fatigue, nausea, and sometimes even depression. . Pancreatic cancer may go undetected until it's advanced. This turns the skin and the eyes yellow, a condition called. These symptoms and signs may include poor appetite, weight loss, abdominal or back pain, jaundice (yellowing of the eyes or skin, dark colored urine and/or light colored bowel movements) with or without itching, fatigue, nausea, and sometimes even depression. Pancreatitis, which is an inflammation of the pancreas, can be a sign of pancreatic cancer if the condition is chronic or when it appears for the first time and is not related to either drinking. Learn about 14 of the most common pancreatic c...
الحقول الإلزامية مشار إليها بـ * التعليق. منتخب تونس ضد غينيا الأستوائية الجمعة. لن يتم نشر عنوان بريدك الإلكتروني. 11.10.2021 · موعد مباراة مصر وليبيا اليوم بتوقيت السعودية. يوافق موعد مباراة مصر ضد ليبيا اليوم الساعة التاسعة بتوقيت مصر العاشرة بتوقيت السعودية. Jhguvgf0kecp2m from goalarab.com السعودية والأردن، الساعة 9 مساءا بتوقيت مصر، وتنقل المباراة قناة بين سبورت bein spotrs 1 hd. 01.12.2021 · مباراة المغرب وفلسطين، الساعة 6 مساءا بتوقيت القاهرة، وتنقل المباراة قناة بين سبورت bein spotrs 2 hd. وتقام مباراة المنتخبين عند الساع 02.09.2021 · مشاهدة مباراة السعودية وفيتنام بث مباشر بتاريخ 2/9/2021 في التصفيات الآسيوية لكأس العالم. 11.10.2021 · موعد مباراة مصر وليبيا اليوم بتوقيت السعودية. القنوات الناقلة المفتوحة لمباراة مصر وليبيا. لن يتم نشر عنوان بريدك الإلكتروني. تنقل عددًا من القنوات الناقلة المفتو� السعودية والأردن...
How To Make A Card Board Box : How To Make A Weatherproof Cardboard Box Fort Hgtv - 18 amazing things parents made for their kids with a cardboard box. . Cardboard box airplane repeat crafter me. The customer for the cardboard box would have given you the desired finished dimensions and you would have started with if you are talking about actual boxes, like cardboard boxes, you would need to make it like paper. Or you can cover an old shoebox with fabric, handkerchief and ribbons to make beautiful and functional basket or storage! A piece of cardboard makes a square box with sides ¼ the original length. Love how bright this version is from made by joel. The box i wanted to make was the type where the lid could be completly removed, similar to those used for board games. This site offers a practically unlimited amount of templates (also knows as 'dielines' or 'nets') for paper craft, packaging, package. In this video i will show you how to make a no...


Komentar
Posting Komentar